Distiller Operation Guide/Instructions
General Maintenance:
to prevent a buildup of scale and contaminants in the boiling tank. We recommend draining the impurities from the boiling tank after each distillation process, or after ten gallons of distilled water made. This is done by opening the waste valve on the boiling tank, drain to release impurities and dispose. (If you have a automatic fill distiller – with the Auto drain, the auto drain does the draining for you.)
Then check the scaling, caused by impurities in the water. Take the lid off your distiller after two weeks use. What kind of scale buildup is taking place. Look around the inside of the boiling tank and on the heating element. We suggest that for every 100 gallons of distilled water made (aprox. 3 months) a de-scaling is required. If you have a automatic drain, De-Scaling twice a year seems to be sufficient, as the optional auto drain insures your boiling tank is always drained — thus reducing maintenance.
**Remember it is easier to clean often, rather than letting the scale build up too thick, making the scale harder to remove.
De-Scaling the Boiling Tank
- Unplug distiller. Remove the boiling tank lid and the charcoal filter.
- Drain the boiling tank and rinse. Remove any loose scale from inside the tank.
- Close the drain valve.
- Fill a pail with hot water, add 2-3 tablespoons of Descaler per gallon of water to be used. If scale is excessive use more Descaler. Stir to dissolve.
- Pour into the chamber you wish to clean. Just to the scale mark. You might have to add more water to the solution, but do not over fill container.
- Let soak for 12-24 hours.
- Drain solution and rinse thoroughly. Repeat cleaning if necessary. (Next time de-scale sooner)
- You may rub the inside of the tank with plastic scouring pads. (Do not use steel wool as it will scratch the tank surface, and be careful not to bend the float)
- It is recommended that the machine be run through the steam sterilization cycle prior to distilling water for usage.
(See Sterilization Instructions)
Fan Switch – for Steam Sterilization:
is a process that allows steam to pass through the condensing coil, and into the storage tank sterilizing the unit. It is best to sterilize your unit after you have completed the de-scaling process.
Steam Sterilization Cooling Coils and/or Storage Tank
- Turn all switches to ‘off’ position.
- Remove charcoal filter.
- Attach sterilization drip tube onto cooling coil exit.
- Place the drip tube end into a pail. (If your sterilizing the storage tank too, place the drip tube end into the storage tank distillation tube opening. Drain the storage tank of any distilled water)
- Manually fill the boiling tank with tap water to the level. ( Aprox. 2.5 inches from the top)
- Turn only, the main power switch to ‘on’, other switches remain off.
- Let the distiller run for approximately 1½ hour. Caution: Distiller will be very hot.
- If you’re sterilizing the storage tank, drain water from the storage tank, and dispose. Close drain faucet.
- Let Distiller cool, then remove sterilization drip tube and save for future cleaning.
- Replace filter. (Now’s a good time to change, to new charcoal)
- Turn all switches to ‘on’ position.
- Replace lid onto distiller and tighten.
- The unit is now ready to distill water again.
*NOTE: If your sterilizing the storage tank and you have a pump…
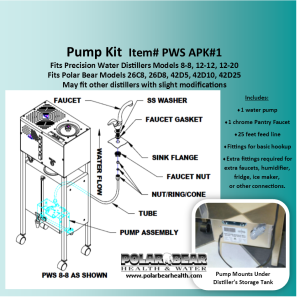
– If your unit is older and has a pump that plugs into the wall – Unplug the pump while sterilizing the storage. Only plug the pump back into the wall after the distiller has made at least two gallons of water. (Never plug the pump in when the storage tank is empty)
– If your distiller is newer, the pump plugs into the distiller. This prevents the pump from operating dry. (No need to unplug)
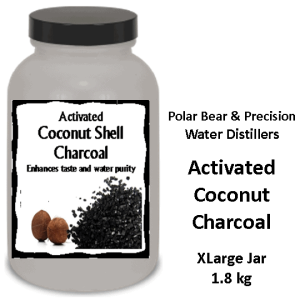
Charcoal Filters: should be used in conjunction with any distiller. This insures the removal of certain chemicals and gases, which vaporize at the same temperature as water. We use only ‘NSF’ approved, 100% pure Granulated Activated Coconut Shell Charcoal in our stainless steel canister filters, we find that this style is easy to change, and economical. ©Note: Never, use aquarium type charcoal.
How often should the charcoal be changed?
Charcoal should be changed when approximately 100 gallons of water has been produced. On average this is in 3 months time.
Stainless Steel Refillable – Using Granulated Coconut Charcoal
- Remove filter.
- Remove the filter lid and empty contents.
- Fill canister 2/3’s full, with new Granulated Activated Coconut Shell Charcoal. Rinse with water (preferably distilled) until the water runs clear. This will rinse the charcoal, removing any charcoal dust.
- Replace lid. Replace the filter, back onto the distiller.
* * Note: Some automatic models use a throw-away type cartridge filter, which is filled with 100% pure coconut shell charcoal
Polar Bear’s CL6 Filter (BestCL6ROT40B or CL6T33B)
Replace approximately every 6 months.
- Remove filter.
- Unscrew barbed fittings and keep them.
- Remove the end caps found on the new filter.
- Screw in the 1/4 x 3/8” barbed fittings into each end of the new filter. Push the pre-cut tubes onto these barbed fittings at least a length of 3/4 inch. (If you did not order new barbed fittings, reuse the original set, complete with tubes)
- Push one tube onto the cooling coil (If the tube is loose at cooling coil replace tube or use a hose clamp) The other end fits into the hole in the top the storage tank.
- Note: This filter has flow directions —
‘In’ at cooling coil — ‘Out’ goes into storage tank.
Precisions 6” Filter (Best Q5336 or Q5333)
This cartridge should be replaced once a year, or after producing approximately 1250 gallons of water.
To replace this filter:
- Swing the filter out and away from the distiller.
- Unscrew, and replace with new cartridge.
Carbon Cups (6506) Aqua Flo, Westbend, Dolfyn, Precision


Reviews
There are no reviews yet.