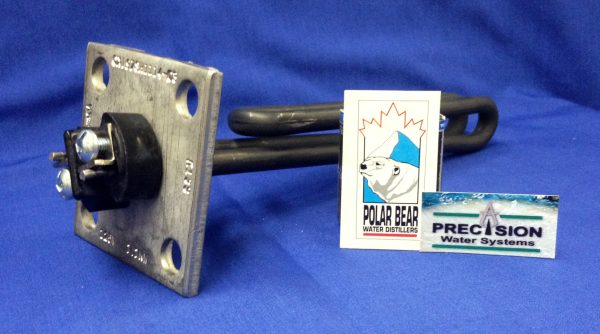
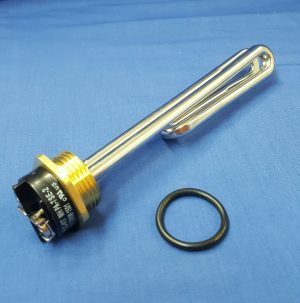
Heating Element 1100 watt – 230 V
Polar Bear Water Distiller Part #100178 & Precision Water Distiller Part #060002
Polar Bear Water Distillers Models: 26E, 26E1, 26E2, 26M, 26-14, 26C, 26CT, 26C8, 26D, 26D4, 26D8 – use 1100 watt element,
Precision Water Distillers Models: 8-M, 5-3, 8-5, 8-8, Life Mist, Traveler: use 1100 watt element,
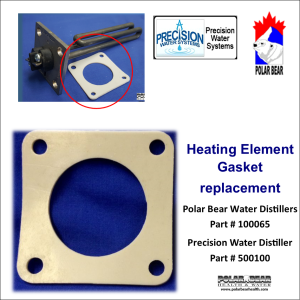
***NOTE: Gasket is not included with element – order this item seperatly. It is a good idea to change the seal gasket, when the element is being replaced.
Measurement – inside plate to tip 7inches
Please read complete instructions before replacing components.
Other parts available and can be ordered seperatly:
Part# Qty Description
Various# 1 Heating Element, 1100w or 1500w or 2500w
100063 1 Heating Element Clip Weld Assembly
100065 1 Heating Element Gasket, Silicon
15002 1 Washer, Flat, SS, 5/16” x 1”
15003 1 Hex nut, SS, 1/4” -20
15004 4 Washer, Flat, SS, 5/16” x 11/16”
15502 4 Nut, Hex, 1/4” plated
Tools Required: 4/16” Deep Well Socket w/Ratchet, 7/16” Wrench, Red Robertson Screwdriver
Heating Element Installation—26E1, 26M, 26E2, 26-14, 26CT, 26D, 42D, 100L, 200L
Assembly Instructions – are written for Polar Bear Water Distillers, other models are very simular, use this as a guide
1.Ensure that the correct parts are included for your replacement. A 26 model distiller will use a 1100W element, a 42D or 100L distiller will use a 1500W element, and a 200L will use a 2500W element. If you have a 200L, also ensure the element is the correct voltage.
2.Turn main power switch on distiller off. Drain the boiler tank. Caution: Drain valve may be very hot. Unplug cord from wall plug and wait at least 1 hour for boiling tank to cool.
3.Using the Robertson screwdriver, remove the Distiller front cover.
4.Using the 7/16” socket, remove the nuts attaching the Lexan reset plate to the boiler tank. The reset switch will hang from the wires without the plate.
5.Remove the boiler tank lid. Referring to Figure2, reaching inside the boiler and using the 7/16” wrench;, remove the nut (4) and washer (5) attaching the heating element clip (3) to the bracket inside the boiler. Move clip out of bracket.
6.Using the flat or Robertson screwdriver, loosen the screws holding the spade connections to the heating element. Note the wires attached to each terminal and write down before removing wires.
7.Remove the nuts (7) and washers (6) attaching the heating element to the copper flashed studs on the boiling tank. Remove the heating element by sliding element out the front of the tank. Remove the old heating element silicon gasket (2). Gently bend the heating element to remove the clip.
8.Place new heating element gasket on boiling tank. Place new clip in heating element and insert new heating element into boiling tank. Fasten element with new washers (6) and new plated nuts (7).
9.Fasten heating element clip to bracket inside boiling tank with new washer (4) and stainless steel nut (5).
10.Reconnect wires to proper heating element terminal.
11.Place reset switch flush against boiler and reattach lexan plate. Replace front cover and boiling tank lid. Ensure impurities drain valve is closed. Ensure reset switch is reset (push in button).
The distiller show now operate properly. If it does not, confirm that the wires are connected to the proper location by referring to your electrical schematic. If they appear correct, we suggest you take your distiller to an authorized service representative, or phone 1-780-477-1328 for assistance.
Distiller Parts | Health Food Stores Edmonton | Natural Food Stores Edmonton | Supplement Stores Edmonton | Health Supplement Stores Edmonton | Best Supplement Stores Edmonton | Aromatherapy Stores Edmonton | Vitamin Stores Edmonton | Herbal Stores Edmonton | Natural Body Care Edmonton | Cooler Stores Edmonton | Distiller Stores Edmonton | Reverse Osmosis Water Filters Edmonton | Water Pumps Edmonton | Water Pumps for Sale Edmonton

Reviews
There are no reviews yet.